How to Set Up a Montessori Play Space That Looks Good on Your Feed

The Montessori shelf is the new gallery wall. Here's how to build one your baby will actually learn from — and you'll actually want to photograph.
"The Montessori shelf is the new gallery wall. Treat it like one."
Here's a truth no parenting philosophy book will admit: the reason Montessori spaces look so good is the same reason a well-styled bookshelf looks good. Intentional curation, natural materials, and generous white space. That's it.
You don't need a pedagogy degree to create a beautiful, functional Montessori-inspired play space. You need a low shelf, fewer toys than you think, and a working understanding of what materials actually photograph well. This guide covers both — the developmental reasoning and the aesthetic execution.
The three principles
01. Less is more — always
Montessori environments present a small number of carefully chosen objects. Fewer toys means more focus from your child — and a cleaner visual. The two goals are perfectly aligned.
02. Natural materials only
Wood, linen, cotton, natural rubber. Not because plastic is always bad — but because natural materials have warmth, weight, and tactile variation that both look better and give babies more sensory information.
03. Child-led accessibility
Everything at eye level. Everything reachable. The visual rhythm of a low shelf with objects the child can independently access is exactly what makes these spaces so beautifully composed.
Step by step setup
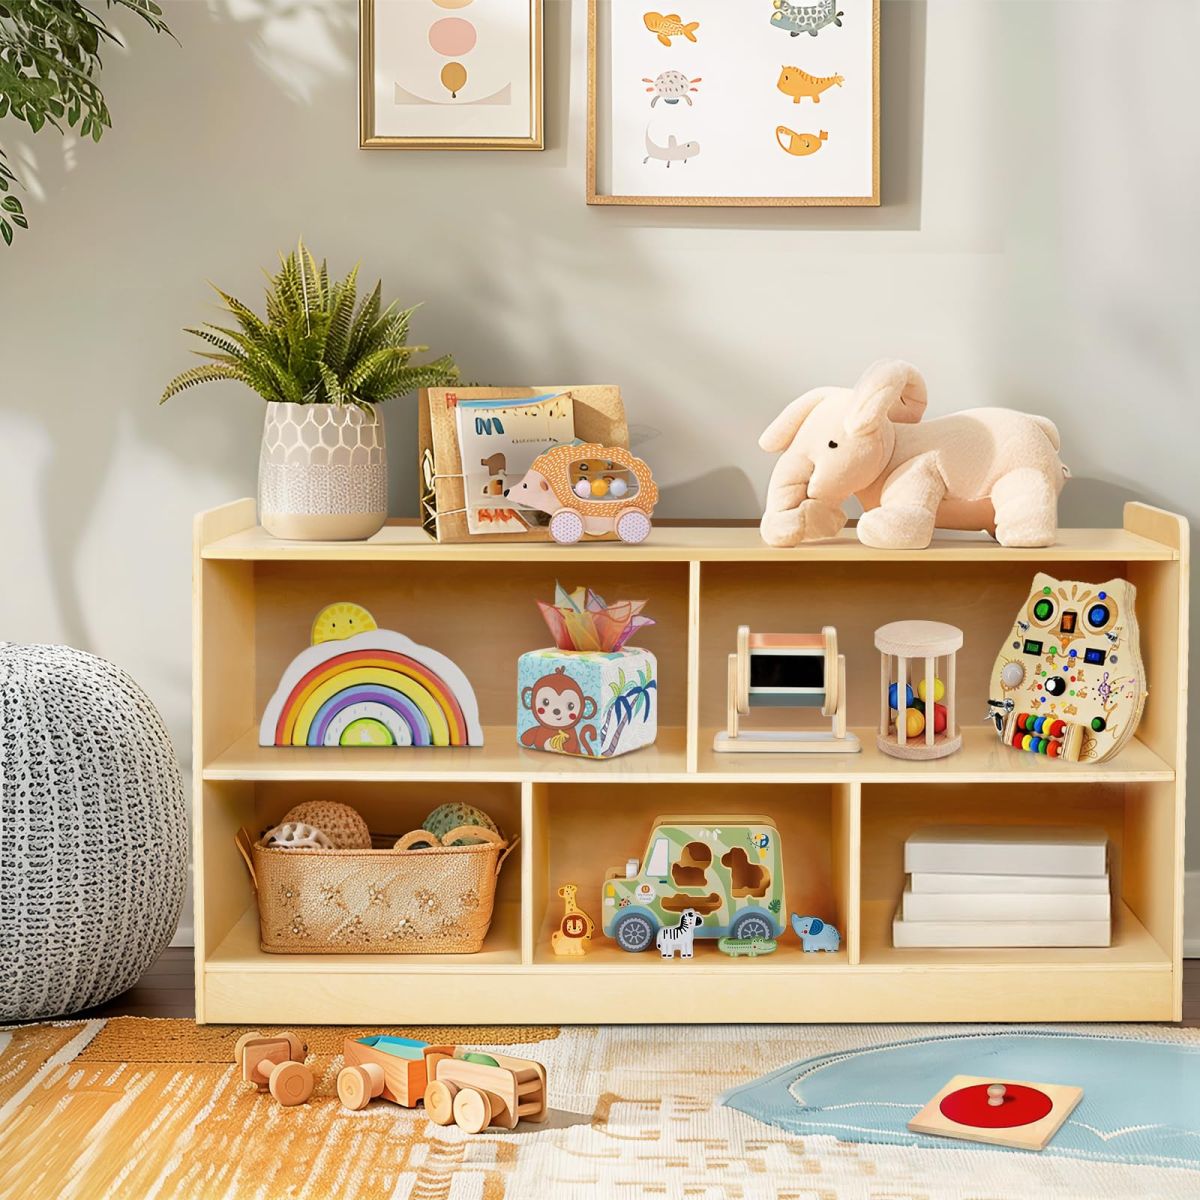
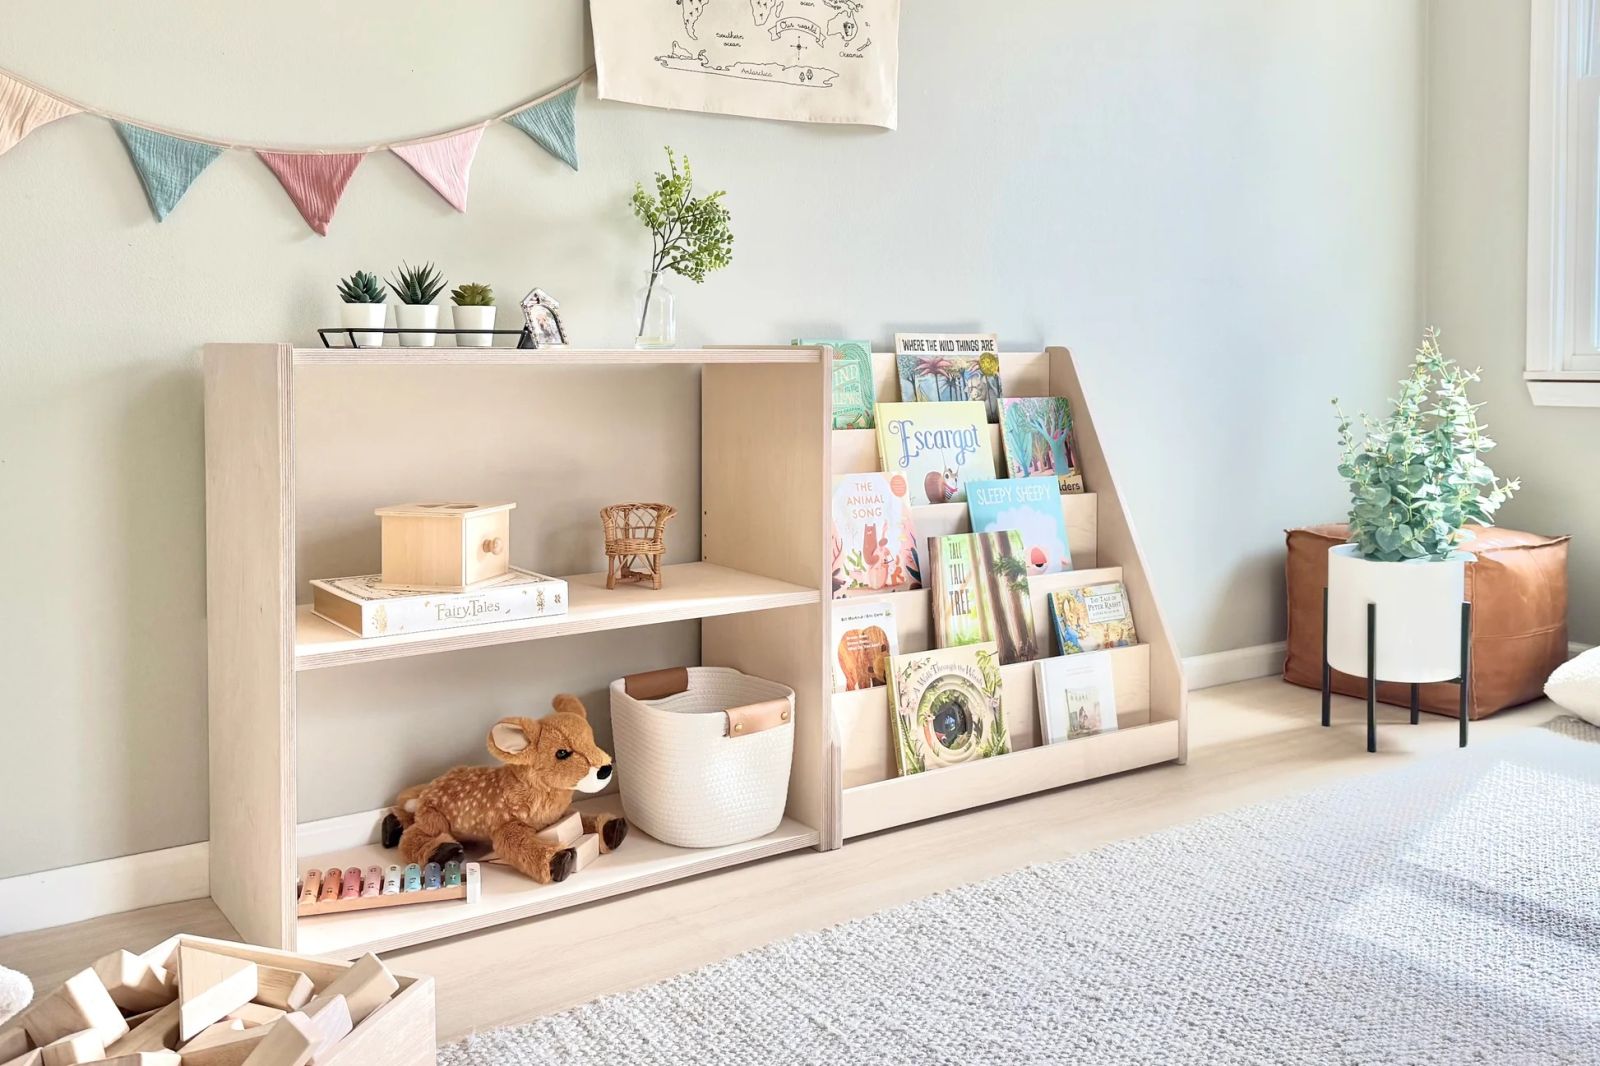
1. Choose your shelf — it's the anchor piece
Every great Montessori space starts with the right shelf. This is the piece that sets the aesthetic tone for everything else — so it deserves actual consideration, not a quick Amazon search.
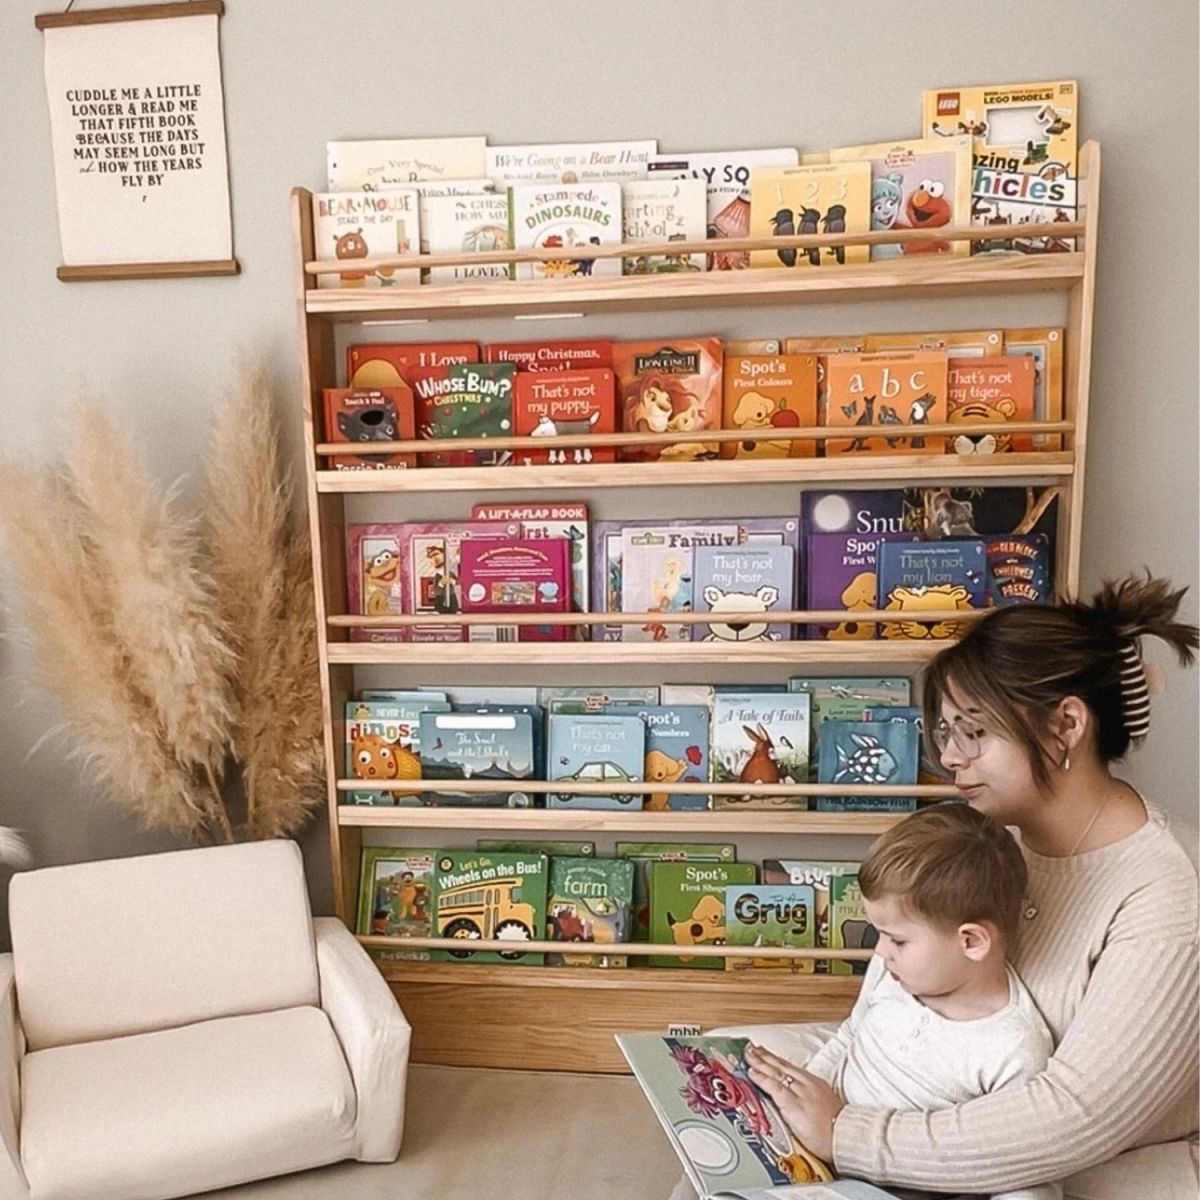
You want a low, open shelf with no doors — typically between 40–60cm high for a baby or young toddler. Solid timber is the visual standard; avoid particleboard or MDF, which looks flat in photographs and doesn't age well. Wall-mounted floating shelves work beautifully for smaller spaces and give a more architectural look.
What to look for aesthetically: warm timber tones (oak, birch, pine with natural oil finish), clean lines with no ornate detailing, and enough depth on each shelf (at least 20cm) to display objects without crowding them.
Styling rule: Treat each shelf level as a separate composition. Leave at least 40% of each shelf empty. The negative space is doing as much visual work as the objects.
✓ Do this
- Solid timber — oak, pine, birch
- Natural oil or wax finish
- Low height — 40–60cm for floor access
- Open shelving, no doors or bins
- 3–5 objects per shelf maximum
✕ Avoid
- White-painted MDF or particleboard
- Toy boxes — hides everything and kills curation
- Too-tall shelves (out of reach defeats the point)
- Crowded displays — more than 6 items per shelf
- Mixed bright plastic across the display
2. Edit your toy collection ruthlessly
The hardest part of building a beautiful Montessori shelf isn't buying the right things — it's removing the wrong ones. That brightly coloured battery-operated toy that plays seven different songs? It doesn't belong on the shelf. It can live in a basket in a cupboard for special occasions. But it doesn't get prime real estate.
The objects that photograph beautifully and function well for early development share the same characteristics: natural materials, muted colours, open-ended design. A set of wooden stacking rings. A simple woven basket of smooth stones or wooden balls. A soft linen doll. A small cloth book. A wooden shape puzzle. These are the objects worth displaying.
"I packed away two-thirds of the toys we'd been given and only kept the wooden and fabric ones on the shelf. My daughter immediately started engaging more — and I finally loved how the room looked. I didn't realise both of those things were the same solution."
Isabelle, mum of one · Brisbane
WOOD: Wooden stacking & nesting toys
Arches, rings, cylinders and cubes in natural timber tones. The visual anchor of any well-styled Montessori shelf — and genuinely one of the most development-rich toy categories from 6 months onward.
Display priority: high
STORAGE: Woven storage baskets
Seagrass, rattan or cotton rope baskets in natural, cream or warm terracotta tones. Use them to contain smaller objects (smooth wooden balls, fabric squares, natural materials) while keeping the shelf looking intentional.
Display priority: high
TEXTILE: Linen & organic cotton soft toys
A small linen bunny or cotton doll in a neutral palette adds warmth and texture to a shelf without introducing the visual noise of bright synthetic plush. Choose one — it's a focal point, not a collection.
Display priority: medium
NEUTRAL: Natural décor objects
A small ceramic arch. A smooth stone. A dried pampas sprig in a tiny vase. These non-toy styling elements are the secret to making a Montessori shelf look like a grown-up designed it — because one did.
Display priority: editorial
3. Master the rotation — it keeps the shelf fresh
Toy rotation is both the most Montessori thing you can do and the most aesthetically practical one. Fewer toys on display means a better-looking shelf. Rotating every 2–3 weeks keeps your child's engagement high — they rediscover stored toys with fresh interest — and keeps your shelf from accumulating visual clutter.
Store the off-rotation toys out of sight in a lidded basket or a section of the wardrobe. When you rotate, don't just swap randomly — consider what developmental skills you're prioritising that month (fine motor, spatial reasoning, cause-and-effect) and choose the shelf objects accordingly.
The 2-week rotation rhythm
A simple system that keeps the shelf looking considered — and your child genuinely engaged.
- Store: Pack away current shelf into a storage basket out of sight
- Select: Choose 8–10 items from storage based on development stage
- Style: Arrange with negative space — objects, not clutter
- Shoot: Morning light, from slightly above. It always looks good
The photography trick: Shoot your shelf in the morning when natural light is soft and directional. Position yourself slightly above shelf height, angled down at about 15 degrees. This is the angle that makes every shelf photo on Instagram look that good — and now you know why.
4. Work with a palette, not just products
The biggest single mistake people make with Montessori shelves is buying individual items they love in isolation, without thinking about how they sit together visually. A beautiful wooden arch and a beautiful bright red sorting toy are both lovely objects — but they don't belong on the same shelf.
Choose a colour palette before you start buying, and commit to it. You don't need to be rigid, but working within a consistent palette is what turns a shelf of nice objects into a styled space.
A Montessori palette that photographs beautifully
Warm neutrals, earthy accents, one organic pop — this is the palette that works in every home.
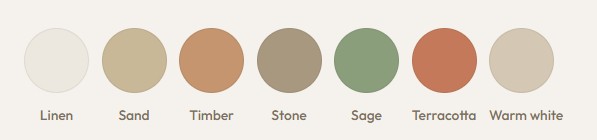
The rule: 70% linen / sand / timber neutrals, 20% stone and sage mid-tones, 10% terracotta or a single accent pop. One bright object can be intentional. Three reads as chaos.
5. Add the styling layers that make it editorial
This is the step most guides skip — the difference between a tidy shelf and a beautiful one. Once you have the toys arranged, add one non-toy styling element per shelf level. A single sprig of dried grass in a small terracotta vase. A smooth ceramic object. A tiny framed print propped against the back panel. A single smooth river stone.
These objects serve no developmental function and exist entirely to make the space look intentional. That's a completely valid reason to include them. You are allowed to design your child's space as thoughtfully as the rest of your home.
The editorial trio: Every well-styled shelf has three types of objects — functional (the toy itself), textural (a basket, a textile, a woven element) and architectural (an arch, a geometric shape, a small ceramic). One of each, per shelf level. This is the formula.
Caption ready · Share this setup
"Updated the shelf for this month's rotation ✨ Currently obsessed with how the wooden arches and linen basket sit together. Sage plant from the local market, little ceramic arch from our nursery. She spent 40 minutes on those stacking rings this morning — which is basically a full working day in toddler time."
#montessoriathome #montessoriaustralia #playshelf #neutralnursery #woodentoys #montessoriplay #aestheticnursery #modernmum #babycentral #minimalistnursery
Shop the Montessori edit at Baby Central Singapore
Wooden toys, woven baskets, linen soft toys and natural décor — curated specifically for the kind of shelf that earns its space.
The shelf that grows with them
A well-designed Montessori play space isn't a project you complete once and photograph. It evolves with your child — the objects change as developmental needs change, the rotation shifts as interests emerge, and the aesthetic deepens as you get better at knowing what belongs there and what doesn't.
What stays constant is the underlying logic: less, but better. Natural, not synthetic. Accessible, not displayed. That logic happens to produce spaces that look beautiful and spaces that support development. The fact that those two outcomes are the same outcome is not a coincidence — it's the reason Montessori has outlasted every other nursery trend by about a century.
Build the shelf. Rotate the toys. Trust the negative space. And yes — photograph it in the morning light.
Baby Central · Singapore trusted baby specialist
This article is for styling and product guidance only. Montessori principles referenced are general in nature — for tailored developmental advice, consult your child health nurse or a certified Montessori educator. All toy safety recommendations align with ACCC standards current at time of publication.